Ingredients:
- 1 medium zuc
- 2 eggs (room temperature)
- 50g melted butter
- 85g raw sugar
- 1 tsp vanilla extract
- 20g cocoa powder
- 120 g white flour
- 1/2 tsp baking powder
- 1/2 tsp baking soda
- 1 pinch of salt
Method:
1. Preheat over to 170C and line 12 muffin tray
2. Cut zuc place in bowl, 2 secs/Sp 5. I grated extra longer to mince it more
3. scrape to a towel and squeeze excess juice, return to bowl
4. Add butterfly
5. Add eggs, melted butter, sugar, vanilla- Sp3/6 seconds, scrape down and Sp3/6 seconds again
6. Add remaining dry ingredients
7. scope into muffin case and bake for 18 minutes.
Showing posts with label Chocolate. Show all posts
Showing posts with label Chocolate. Show all posts
Sunday, April 15, 2018
Saturday, July 23, 2016
Famous Amos Wanabe Cookie
adapted from:
http://www.bearnakedfood.com/2015/04/17/almost-famous-amos-cookies/


http://www.bearnakedfood.com/2015/04/17/almost-famous-amos-cookies/
Ingredients:
2 ½ cup (300 g) self-raising flour
8 oz. (250 g) unsalted butter – softened at room temperature
110g dark brown sugar
80g caster sugar
1/2 tsp salt
1/2 tsp coffee oil / emulsion
1 large egg
1 tsp vanilla extract
1/4 cup (25 g) instant oats – grind to powder in Thermomix
1/4 cup (25 g) ground almond powder
1 ½ cup (250 g) semi-sweet chocolate chips - I only had 180g Choc chips so I added 70g pine nuts instead
Instructions:
- Beat the egg with coffee emulsion and vanilla extract in a small bowl, cover with cling wrap and let it infuse for at least 2 hours or overnight in fridge. Bring to room temperature before to use.
- Preheat oven to 160°C/320°F. Beat the softened butter, salt and sugar in a large bowl until light and fluffy. Add in egg mixture, ground oats and ground almond. Mix well. Pour in the chocolate chips and mix until well distributed. Lastly, sift in the flour and fold into the mixture.
- For small cookies – use a small teaspoon and scoop the dough. Drop the dough onto a baking tray lined with baking paper. Place them slightly apart and bake for 20 mins or until golden brown.
- For large cookies – use a tablespoon and scoop the dough. Follow the same steps above and bake for 27 – 30 mins or until golden brown.
- Once they are done, place them on a cooling rack to cool completely. Store in air tight containers. They actually taste even better the next day as the flavors develop further.
This is how my batter looks like after mixing
My cookies sizes were very inconsistent and some even got stucked due to the size.
Very sweet but it is what makes is famous Amos like. The crunch is definitely there and kids absolutely loved it.
Wednesday, April 13, 2016
Mars Bar Slice
Adapted from :
http://thermofun.com/thermofun-mars-bar-slice-recipe/
Ingredients:
- 180g Mars Bars, 3 x 60g bars - broken up into quarters
- 90g butter, cubed
- 90g Rice bubbles
- 150g cooking chocolate or Choc chips
- 20g grapeseed oil
Chocolate Topping
Method
- Add Mars Bars and butter to the TM bowl and melt 4 mins / 50° / Speed 3. Scraping down the side of the bowl if necessary half way through.
- Add Rice Bubbles and combine 20 sec / Speed 3 / Reverse
- Empty into a lined, square slice pan (approx 20x20cm) and press gently down creating a flat surface.
- Melt chocolate and oil in the TM bowl 3 mins / 50° / Speed 3.
- Scrape down edges and melt for a further 2 mins / 50° / speed 1.
- Pour the melted chocolate evenly over the slice.
Topping

Tiny teddies chocolate version
Adapted from:
http://www.trtlmt.com.au/chocolate-teeny-teddies/
Ingredients:
- Place butter, sugar, honey and vanilla into bowl.
- Melt at 100 degrees, speed 2 for 5 minutes.
- Add remaining ingredients.
- Mix on speed 3 for 45 seconds or until well combined.
- This will be a sticky, wet dough. It firms upon cooling however.
- Remove dough from bowl or saucepan and place onto a silicone mat in a rectangle shape to cool slightly, approximately 5 minutes. Be careful as this will be hot. Do not put it in the fridge or leave it too long as it will be harder to work with.
- Preheat oven to 180 degrees. Line two large baking trays with baking paper.
- Once dough is slightly cooled and easy to work with, roll out into a thin rectangle about 2mm in thickness. When I roll, I lift and flip it over a few times whilst rolling to ensure its an even roll. Work gently and slowly when lifting and flipping.
- If your dough is sticky allow it to cool a little longer. You want a dough that is able to be lifted from the surface it is being rolled on.
- Using a small teddy cutter cut shapes from the dough. You may choose to cut and then place the teddy on the tray or you may chose to cut them all at once then peel away from the mat and put on the tray. You can see both options in the blog photo.
- Cut as many from the first batch us possible. As the dough cools it is harder to roll. Warm for 15-30 seconds in the microwave if it dries or cool too much.
- These will only need to bake for 5-8 minutes or so. Watch them very carefully. You want them slightly browned and a crunch to them. Do not overcook though. Burnt chocolate is not tasty. Every oven varies so watch them

Avocado Choc Chip cookies
Adapted from:
http://www.trtlmt.com.au/chocolate-avocado-biscuits/
Ingredients:
- 1 large avocado, flesh only
- 150g plain flour
- 90g sugar or sweetener of choice
- 2 Tbsp cocoa powder
- 1 tsp vanilla bean paste
- 1 tsp baking powder
- 90g softened butter
- 100g choc chips for topping, optional
Method:
- Preheat oven to 180C. Line a baking tray with paper.
- Add avocado to bowl. Speed 7 / 6 seconds. Scrape down.
- Add remaining ingredients except choc chips to the bowl. Speed 6 / 15 seconds. This is a wet-ish dough but can easily be handled due to the butter/oil.
- Roll into 20 small balls and place onto the baking tray.
- Press in a few choc chips on the top.
- Bake for 15-18 minutes or until cooked through.
- Allow to cool on a wire rack.

Tuesday, December 15, 2015
Easy Thermomix Rich Chocolate Cake
Adapted from:
http://www.recipecommunity.com.au/baking-sweet-recipes/rich-chocolate-cake/17281


http://www.recipecommunity.com.au/baking-sweet-recipes/rich-chocolate-cake/17281
INGREDIENTS
Rich Chocolate Cake
- 200 g dark chocolate,, broken into pieces
- 180 g sugar
- 180 g unsalted butter,, cut into pieces
- 50 g plain flour
- 1 pinch of salt
- 3 eggs
- 150 g fresh or frozen raspberries
RECIPE'S PREPARATION
Rich Chocolate Cake
1.
Preheat oven to 190°C.
2.
Place chocolate, butter and sugar into mixing bowl and melt for 5 min/60°C/speed 2. Don't be concerned if the sugar doesn't dissolve, just make sure the chocolate and butter have melted.
3.
Add flour, a pinch of salt and eggs and mix for 15 sec/speed 4.
4.
Pour into a lined 20cm round cake tin and bake for 20-30 minutes or until the edges have come away from the sides of the tin and a skewer tests almost clean.
5.
Garnish with raspberries before serving.
TIP
This cake is best eaten cold as it almost sets when it is cooling to a fudgy interior and chewy sugary crust. Just lovely.
Dust with icing sugar or top with chocolate icing to serve. This cake is wonderful as a rich, decadent dessert cake.
Use any flour you like. Self raising flour for a lighter cake, plain flour for a denser cake, gluten free flour for people with allergies or spelt flour for the extra protein.Use any sugar you like. I've used white sugar and rapadura sugar in this recipe and both work well.
Saturday, October 24, 2015
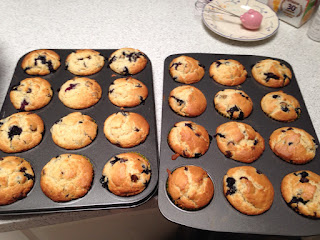
Blueberry and Choc Chip muffin
Adapted from the thermomix Facebook
Ingredients:( I doubled it to make 24 muffins)
340g milk
150g grape seed oil
4 eggs
210 g sugar
600g self raising flour
4 tsp baking powder
1 cup Choc chips
250g fresh blueberries
Method:
1. Preheat oven to 180C
2. Add milk, oil and eggs. Mix 10s Sp 4
3. Add sugar, flour,baking powder. Mix 5s Sp 4
4. Add blueberries and Choc chips. Gently folds till combined. Do not overmix
5. Divide the mixture into lined muffin trays and baked for 20-30 mins until toothpick comes clean when inserted into muffins. Mine took 20 mins
* I used the kitchen aid to mix as my mixture was too much for the tmx bowl. Still turn out well. Original recipe ask for desiccated coconut but I omitted as I am not a fan of coconuts.


Sunday, August 03, 2014
Banana Chocolate Mousse Cake
This cake requires so many different method of preparing. First thing is baking the chocolate chiffon cake. Then slicing it into 3 layers. Then the mousse and banana filing and I was suppose to make a ganache but the cake didn't look very nice so I had to improvise last minute.
Chocolate Chiffon Cake
Ingredients:
**A**
6 egg yolks
200gms cake flour
120gm sugar
50gm cocao powder mix with 180ml water ( I used the plainstowe brand for all chocolate baking, I find it very nice and full of flavor)
90ml vegetable oil
1/2 tsp baking soda
1/2tsp baking powder
**B**
6 egg whites
60gm sugar
***
9inch round baking pan
Method:
1. Preheat over to 180C
2. Line the bottom of the baking dish with baking paper. I butter it first so the baking paper can stick. I line this on the bottom and the sides to ensure the cake is able to come out easily
3. Mix all item in **A** in the thermomix on Speed 5 for 20-30 seconds until it is nicely mixed and then set it aside
4. I bought a hand mixer and mix **B** together until it forms stiff peaks. This takes a good 7-9 minutes. Again it depends on the equipment you are using. I stopped when the peaks are able to hold on its on
5. Fold the egg whites into the chocolate mixture from Step3. Slowly fold to ensure the air does not get out. I gently fold this till the mixture is nicely combined
6. Pour into the baking pan and bake for 40-45 minutes. Mine was done in 40 minutes
7. Remove the cake from the baking pan and let it cool on the rack before starting the slicing process
8. Once cooled, divide into 3 equal parts and start slicing. I used a long serrated knife to get this nicely divided
9. The cake is now done, set it aside and continue with the next part
Chocolate Mousse and Banana
Ingredients:
250gms of good milk chocolate bars
130gms of milk
500ml thicken cream
50gms sugar
8 bananas
Method:
1. I melt the chocolate and milk in the microwave in 30second interval. Set it aside to work on the cream
2. I got nervous with this part. I was not sure how to expect the right consistency of the whipped cream. I watched the youtube on Benelux chocolate mousse for thermomix for countless times but yet I got it wrong. you are suppose to place the butterfly in the Thermomix, pour in cream and sugar. On Speed 3, with MC off, whipped it for 20-50 seconds. I think I stopped too soon as my mousse was still runny. Definitely need to lengthen this next time.
3. Gently fold the cream into the chocolate mix and then set aside
4. Slice up the bananas in equal sizes so the cake will not be bumpy. I did not do this so my cake did not had the nice round top
Assembling:
1. Place the first layer of the cake on a plate
2. scoop the mousse and then place the sliced bananas on it. Then add more mousse
3. Work this for all the layers. I had very runny mouse so it was very messy, I used the remaining mousse to cover the whole cake
4. Place the cake in the fridge to let it continue to set
Decorating.
I was suppose to used ganache to pour over the cake and have a nice glossy cake but because my surface was not perfect I ended up making large chocolate shards and shaving to cover the imperfections
1. melt 250gms of dark chocolate over a pot of boiling water, never boil chocolate directly on the stove.
2. Pour the melted chocolate over huge pieces of baking paper and let it set in the fridge till it hardens. This step was too messy for me to take any pictures.
3. Once set, cut the chocolate up into pieces and start sticking it to the sides of the cake
4. I made some thin chocolate shavings to sprinkle all over the cake, so it covers all the loop sides.
.jpg)
This is my chocolate chiffon cake resting and getting ready to cut
.jpg) Assembling the cake. notice how runny my mousse is
Assembling the cake. notice how runny my mousse is
.jpg) See how imperfect this cake is. The sides look like an alien head
See how imperfect this cake is. The sides look like an alien head
.jpg) After masking the imperfection with chocolate shavings it look much better
After masking the imperfection with chocolate shavings it look much better
.jpg) Top up with some strawberries for colour and also balance of flavor
Top up with some strawberries for colour and also balance of flavor
.jpg) ta daaa. done. the patterns on the chocolate were not intentional, I did not flatten the chocolate shards nicely so it had some uneven pattern, but I think it looks pretty nice this way.
ta daaa. done. the patterns on the chocolate were not intentional, I did not flatten the chocolate shards nicely so it had some uneven pattern, but I think it looks pretty nice this way.
 This is how the slices look after cutting up, it was perfect and next time I will make sure the mousse is right.
This is a cake for a 6 year old boy :)
Chocolate Chiffon Cake
Ingredients:
**A**
6 egg yolks
200gms cake flour
120gm sugar
50gm cocao powder mix with 180ml water ( I used the plainstowe brand for all chocolate baking, I find it very nice and full of flavor)
90ml vegetable oil
1/2 tsp baking soda
1/2tsp baking powder
**B**
6 egg whites
60gm sugar
***
9inch round baking pan
Method:
1. Preheat over to 180C
2. Line the bottom of the baking dish with baking paper. I butter it first so the baking paper can stick. I line this on the bottom and the sides to ensure the cake is able to come out easily
3. Mix all item in **A** in the thermomix on Speed 5 for 20-30 seconds until it is nicely mixed and then set it aside
4. I bought a hand mixer and mix **B** together until it forms stiff peaks. This takes a good 7-9 minutes. Again it depends on the equipment you are using. I stopped when the peaks are able to hold on its on
5. Fold the egg whites into the chocolate mixture from Step3. Slowly fold to ensure the air does not get out. I gently fold this till the mixture is nicely combined
6. Pour into the baking pan and bake for 40-45 minutes. Mine was done in 40 minutes
7. Remove the cake from the baking pan and let it cool on the rack before starting the slicing process
8. Once cooled, divide into 3 equal parts and start slicing. I used a long serrated knife to get this nicely divided
9. The cake is now done, set it aside and continue with the next part
Chocolate Mousse and Banana
Ingredients:
250gms of good milk chocolate bars
130gms of milk
500ml thicken cream
50gms sugar
8 bananas
Method:
1. I melt the chocolate and milk in the microwave in 30second interval. Set it aside to work on the cream
2. I got nervous with this part. I was not sure how to expect the right consistency of the whipped cream. I watched the youtube on Benelux chocolate mousse for thermomix for countless times but yet I got it wrong. you are suppose to place the butterfly in the Thermomix, pour in cream and sugar. On Speed 3, with MC off, whipped it for 20-50 seconds. I think I stopped too soon as my mousse was still runny. Definitely need to lengthen this next time.
3. Gently fold the cream into the chocolate mix and then set aside
4. Slice up the bananas in equal sizes so the cake will not be bumpy. I did not do this so my cake did not had the nice round top
Assembling:
1. Place the first layer of the cake on a plate
2. scoop the mousse and then place the sliced bananas on it. Then add more mousse
3. Work this for all the layers. I had very runny mouse so it was very messy, I used the remaining mousse to cover the whole cake
4. Place the cake in the fridge to let it continue to set
Decorating.
I was suppose to used ganache to pour over the cake and have a nice glossy cake but because my surface was not perfect I ended up making large chocolate shards and shaving to cover the imperfections
1. melt 250gms of dark chocolate over a pot of boiling water, never boil chocolate directly on the stove.
2. Pour the melted chocolate over huge pieces of baking paper and let it set in the fridge till it hardens. This step was too messy for me to take any pictures.
3. Once set, cut the chocolate up into pieces and start sticking it to the sides of the cake
4. I made some thin chocolate shavings to sprinkle all over the cake, so it covers all the loop sides.
This is my chocolate chiffon cake resting and getting ready to cut
This is a cake for a 6 year old boy :)
Monday, December 30, 2013
Christmas Bark
I love reading Karen Cheng's blog and especially love it when she post simple and creative recipes on her blog. This christmas bark is adapted from her blog: http://www.karencheng.com.au/2013/11/27/amazing-chocolate-bark/
I like to call it Christmas bark as it has all the nice bright colors to match the festive season and also, it was part of a lazy attempt to get easy dessert out for our Christmas lunch.
Ingredients:
- 1 packet of Malt and Milk biscuits from Arnotts.
- Pretzels
- Oreos cookies
- Lollies
- Pistachio nuts, lightly pounded into small pieces
- Chocolate chips
- M & M
- 1 bar of baking chocolate (melted)
Method:
1. Melt chocolate bar in microwave in 30 seconds interval. I manage to melt my chocolate within 60 seconds
2. Line a rectangle tray with foil and arrange the biscuits nicely on the tray
3. Pour the melted chocolate over the biscuits and then start decorating
4. You can put any yummy goodies you like in this bark. I just make used of all our leftover candies, biscuits and nuts. The more salty items the better it tastes.
5. After decorating, place in the fridge overnight for it to set.
6. Just break it into pieces to eat. The kids will enjoy this colorful, fun dish.

These are the stuff I used for my Christmas bark. You do not need alot, just small bowls of each treat as the bark can get really heavy with all the toppings.

2 trays of biscuits

All done. Easy peasy
Sunday, December 01, 2013
M & M Birthday Cake
Another milestone for the family. Cake recipe adapted from:
http://www.howtocookthat.net/public_html/best-chocolate-cake-ever/
Butter cream recipe also adapted from the same site:
http://www.howtocookthat.net/public_html/buttercream-cupcake-frosting-recipes/
Chocolate Cake Ingredients:
200g (7.05 ounces) 70% cocoa dark chocolate, I used Plainstowe Chocolate bars.
320gms Butter
8 eggs
2 1/4 cups caster sugar
1 1/4 cups plain flour
1/4 cup cocoa powder, I used Plainstowe dutch processed cocoa powder
1 1/2 tsp baking powder
Method:
1. Melt chocolate bar and butter in microwave. Check every 30 seconds to ensure all ingredients are melted nicely. Place aside for it to cool

2. Whisk egg and sugar together. Thermomix Speed 4, 5 seconds

3. Combined egg and chocolate mixture from Step 1. I used Speed 4 for 10-15 seconds.
4. Sift the dry ingredients, Flour, Cocoa powder and baking powder

5. Mix in the dry ingredients in the wet ones. I used the same Thermomix settings and just stop when all ingredients are nicely incorporated.
6. I distribute the mixture between 2 round 9 inch baking tins. Baked this for 20 minutes at 160C

Butter cream Ingredients:
120g (4.23 ounces) butter
1 1/3 cups icing sugar
1/2 cup cocoa powder, i used the same Plainstowe powder as the cake.
1-2 tsp milk
Iced the cake when it is cooled.
For decorations, i used Cadbury chocolate fingers ( 3 packets), 4 packets of M & Ms. Just lined the chocolate fingers around the cake and then decorate as you like for the top of the cake.


Subscribe to:
Posts (Atom)